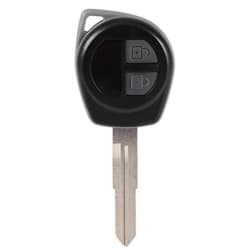
Suzuki Swift Remote Programming

Suzuki type 2.png
NOTE: All existing remotes must be reprogrammed when following this procedure. NOTE: The below procedure only programs in the remote control. The transponder must be programmed using diagnostic equipment in order to start the vehicle. 1. Sit in the vehicle with the driver's door open (all other doors must be closed) & key removed from ignition. 2. Insert key into the ignition, turn to the "On" position for 1 second, then turn back to "Off" & remove the key. 3. Perform the following 3 times: A. Close driver's door. B. Pause for 3 seconds. C. Open driver's door. D. Pause for 3 seconds. 4. Insert key into the ignition, turn to the "On" position for one second, then turn back to "Off" & remove the key. (The door locks will cycle to indicate that the vehicle is in programming mode. If they did not cycle, restart the procedure from Step 1). 5. Press and hold the "Lock" button on the new remote. Door locks will cycle to indicate the remote has been accepted (some older models, the hazard lights will flash instead). 6. Repeat step 5 for all existing remote controls. 7. Close and open driver's door once, to exit programming mode.
